
On this tutorial, you’ll learn to create a pixel/grid displacement impact utilizing Three.js, enhanced with shaders and GPGPU strategies. The information covers the applying of a delicate RGB shift impact that dynamically responds to cursor motion. By the tip, you’ll achieve a strong understanding of manipulating textures and creating interactive visible results in WebGL, increasing your inventive capabilities with Three.js.
It’s advisable that you’ve some primary understanding of Three.js and WebGL for understanding this tutorial. Let’s dive in!
The Setup
To create this impact, we’ll want two textures: the primary is the picture we wish to apply the impact to, and the second is a texture containing the information for our impact. Right here’s how the second texture will look:
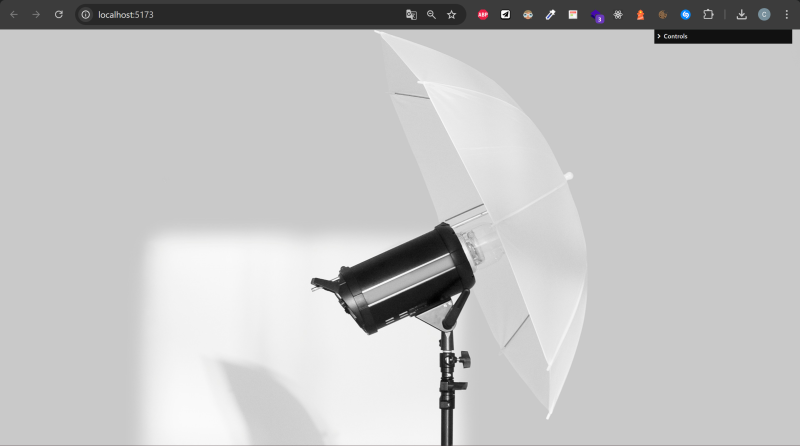
First, we’ll create a primary Three.js aircraft with a ShaderMaterial that can show our picture and add it to our Three.js scene.
createGeometry() {
    this.geometry = new THREE.PlaneGeometry(1, 1)
  }

  createMaterial() {
    this.materials = new THREE.ShaderMaterial({
      vertexShader,
      fragmentShader,
      uniforms: {
        uTexture: new THREE.Uniform(new THREE.Vector4()),
        uContainerResolution: new THREE.Uniform(new THREE.Vector2(window.innerWidth, window.innerHeight)),
        uImageResolution: new THREE.Uniform(new THREE.Vector2()),
      },
    })
  }

  setTexture() {
    this.materials.uniforms.uTexture.worth = new THREE.TextureLoader().load(this.aspect.src, ({ picture }) => {
      const { naturalWidth, naturalHeight } = picture
      this.materials.uniforms.uImageResolution.worth = new THREE.Vector2(naturalWidth, naturalHeight)
    })
  }

  createMesh() {
    this.mesh = new THREE.Mesh(this.geometry, this.materials)
  }
I handed the viewport dimensions to the uContainerResolution uniform as a result of my mesh occupies all the viewport house. If you would like your picture to have a special measurement, you’ll need to cross the width and peak of the HTML aspect containing the picture.
Right here is the vertex shader code, which can stay unchanged since we’re not going to switch the vertices.
various vec2 vUv;

void important()
{
    vec4 modelPosition = modelMatrix * vec4(place, 1.0);
    vec4 viewPosition = viewMatrix * modelPosition;
    vec4 projectedPosition = projectionMatrix * viewPosition;
    gl_Position = projectedPosition;

    vUv=uv;
}
And right here is the preliminary fragment shader:
uniform sampler2D uTexture;

various vec2 vUv;
uniform vec2 uContainerResolution;
uniform vec2 uImageResolution;


vec2 coverUvs(vec2 imageRes,vec2 containerRes)
{
    float imageAspectX = imageRes.x/imageRes.y;
    float imageAspectY = imageRes.y/imageRes.x;

    float containerAspectX = containerRes.x/containerRes.y;
    float containerAspectY = containerRes.y/containerRes.x;

    vec2 ratio = vec2(
        min(containerAspectX / imageAspectX, 1.0),
        min(containerAspectY / imageAspectY, 1.0)
    );

    vec2 newUvs = vec2(
        vUv.x * ratio.x + (1.0 - ratio.x) * 0.5,
        vUv.y * ratio.y + (1.0 - ratio.y) * 0.5
    );

    return newUvs;
}


void important()
{
    vec2 newUvs = coverUvs(uImageResolution,uContainerResolution);

    vec4 picture = texture2D(uTexture,newUvs);

    gl_FragColor = picture;
}
The coverUvs operate returns a set of UVs that can make the picture texture wrap behave just like the CSS object-fit: cowl; property. Right here is the consequence:
Implementing Displacement with GPGPU
Now we’re going to implement the displacement texture in a separate shader, and there’s a motive for this: we will’t depend on traditional Three.js shaders to use our impact.
As you noticed within the video of the displacement texture, there’s a path following the mouse motion that slowly fades out when the mouse leaves the realm. We are able to’t create this impact in our present shader as a result of the information shouldn’t be persistent. The shader runs at every body utilizing its preliminary inputs (uniforms and varyings), and there’s no option to entry the earlier state.
Happily, Three.js offers a utility referred to as GPUComputationRenderer. It permits us to output a computed fragment shader as a texture and use this texture because the enter of our shader within the subsequent body. That is referred to as a Buffer Texture. Right here’s the way it works:
First, we’re going to initialize the GPUComputationRenderer occasion. For that, I’ll create a category referred to as GPGPU.
import fragmentShader from '../shaders/gpgpu/gpgpu.glsl'
// the fragment shader we're going to use within the gpgpu

// ...class constructor
createGPGPURenderer() {
    this.gpgpuRenderer = new GPUComputationRenderer(
      this.measurement, //the scale of the grid we wish to create, within the instance the scale is 27
      this.measurement,
      this.renderer //the WebGLRenderer we're utilizing for our scene
    )
  }
  createDataTexture() {
    this.dataTexture = this.gpgpuRenderer.createTexture()
  }

  createVariable() {
    this.variable = this.gpgpuRenderer.addVariable('uGrid', fragmentShader, this.dataTexture)
    this.variable.materials.uniforms.uGridSize = new THREE.Uniform(this.measurement)
    this.variable.materials.uniforms.uMouse = new THREE.Uniform(new THREE.Vector2(0, 0))
    this.variable.materials.uniforms.uDeltaMouse = new THREE.Uniform(new THREE.Vector2(0, 0))
  }

  setRendererDependencies() {
    this.gpgpuRenderer.setVariableDependencies(this.variable, [this.variable])
  }

  initiateRenderer() {
    this.gpgpuRenderer.init()
  }
That is just about a generic instantiation code for a GPUComputationRenderer occasion.
- We create the occasion in
createGPGPURenderer. - We create a
DataTextureobject increateDataTexture, which will likely be populated with the results of the computed shader. - We create a “variable” in
createVariable. This time period is utilized byGPUComputationRendererto confer with the feel we’re going to output. I suppose it’s referred to as that as a result of our texture goes to range at every body in keeping with our computations. - We set the dependencies of the GPGPU.
- We initialize our occasion.
Now we’re going to create the fragment shader that our GPGPU will use.
void important()
{
vec2 uv = gl_FragCoord.xy/decision.xy;
vec4 coloration = texture(uGrid,uv);
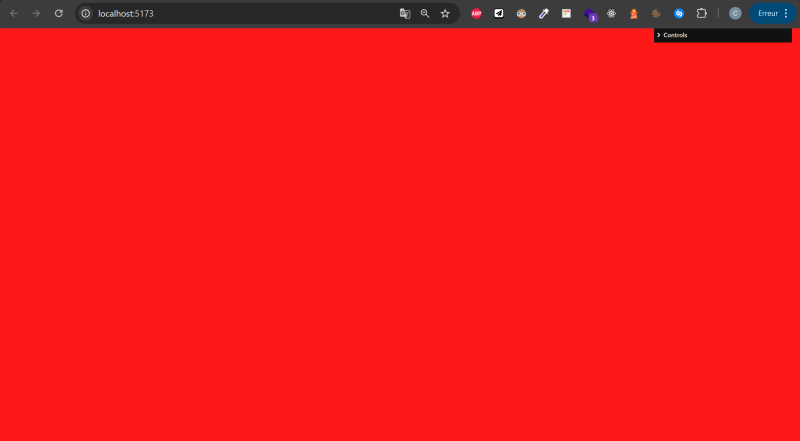
coloration.r = 1.;
gl_FragColor = coloration;
}The present texture that our GPGPU is creating is a plain pink picture. Discover that we didn’t should declare uniform sampler2D uGrid within the header of the shader as a result of we declared it as a variable of the GPUComputationRenderer occasion.
Now we’re going to retrieve the feel and apply it to our picture.
Right here is the whole code for our GPGPU class.
constructor({ renderer, scene }: Props) {
    this.scene = scene
    this.renderer = renderer

    this.params = {
      measurement: 700,
    }

    this.measurement = Math.ceil(Math.sqrt(this.params.measurement))
    this.time = 0

    this.createGPGPURenderer()
    this.createDataTexture()
    this.createVariable()
    this.setRendererDependencies()
    this.initiateRenderer()
  }

  createGPGPURenderer() {
    this.gpgpuRenderer = new GPUComputationRenderer(
      this.measurement, //the scale of the grid we wish to create, within the instance the scale is 27
      this.measurement,
      this.renderer //the WebGLRenderer we're utilizing for our scene
    )
  }
  createDataTexture() {
    this.dataTexture = this.gpgpuRenderer.createTexture()
  }

  createVariable() {
    this.variable = this.gpgpuRenderer.addVariable('uGrid', fragmentShader, this.dataTexture)
    this.variable.materials.uniforms.uGridSize = new THREE.Uniform(this.measurement)
    this.variable.materials.uniforms.uMouse = new THREE.Uniform(new THREE.Vector2(0, 0))
    this.variable.materials.uniforms.uDeltaMouse = new THREE.Uniform(new THREE.Vector2(0, 0))
  }

  setRendererDependencies() {
    this.gpgpuRenderer.setVariableDependencies(this.variable, [this.variable])
  }

  initiateRenderer() {
    this.gpgpuRenderer.init()
  }


  getTexture() {
    return this.gpgpuRenderer.getCurrentRenderTarget(this.variable).textures[0]
  }

  render() {
    this.gpgpuRenderer.compute()
  }
The render methodology will likely be referred to as every body, and the getTexture methodology will return our computed texture.
Within the materials of the primary aircraft we created, we’ll add a uGrid uniform. This uniform will include the feel retrieved by the GPGPU.
createMaterial() {
    this.materials = new THREE.ShaderMaterial({
      vertexShader,
      fragmentShader,
      uniforms: {
        uTexture: new THREE.Uniform(new THREE.Vector4()),
        uContainerResolution: new THREE.Uniform(new THREE.Vector2(window.innerWidth, window.innerHeight)),
        uImageResolution: new THREE.Uniform(new THREE.Vector2()),


        //add this new Uniform
        uGrid: new THREE.Uniform(new THREE.Vector4()),
      },
    })
  }
Now we’re going to replace this uniform in every body after computing the GPGPU texture,
render() {
    this.gpgpu.render()
    this.materials.uniforms.uGrid.worth = this.gpgpu.getTexture()
}
Now, contained in the fragment shader of our first picture aircraft, let’s show this texture.
uniform sampler2D uGrid;

void important()
{
    vec2 newUvs = coverUvs(uImageResolution,uContainerResolution);

    vec4 picture = texture2D(uTexture,newUvs);
    vec4 displacement = texture2D(uGrid,newUvs);

    gl_FragColor = displacement;
}
It’s best to see this consequence. That is precisely what we wish. Bear in mind, all our GPGPU is doing for now could be setting an empty texture to pink.
Dealing with Mouse Motion
Now we’re going to begin engaged on the displacement impact. First, we have to monitor mouse motion and cross it as a uniform to the GPGPU shader.
We are going to create a Raycaster and cross the mouse UVs to the GPGPU. Since we solely have one mesh in our scene for this instance, the one UVs it’s going to return will likely be these of our aircraft containing the picture.
createRayCaster() {
    this.raycaster = new THREE.Raycaster()
    this.mouse = new THREE.Vector2()
  }

  onMouseMove(occasion: MouseEvent) {
    this.mouse.x = (occasion.clientX / window.innerWidth) * 2 - 1
    this.mouse.y = -(occasion.clientY / window.innerHeight) * 2 + 1

    this.raycaster.setFromCamera(this.mouse, this.digicam)

    const intersects = this.raycaster.intersectObjects(this.scene.kids)
    const goal = intersects[0]
    if (goal && 'materials' in goal.object) {
      const targetMesh = intersects[0].object as THREE.Mesh

      if(targetMesh && goal.uv)
      {
        this.gpgpu.updateMouse(goal.uv)
      }
    }
  }

  addEventListeners() {
    window.addEventListener('mousemove', this.onMouseMove.bind(this))
  }
Keep in mind that within the createVariable methodology of the GPGPU, we assigned it a uniform uMouse. We’re going to replace this uniform within the updateMouse methodology of the GPGPU class. We can even replace the uDeltaMouse uniform (we’ll want it quickly).
updateMouse(uv: THREE.Vector2) {

    const present = this.variable.materials.uniforms.uMouse.worth as THREE.Vector2

    present.subVectors(uv, present)

    this.variable.materials.uniforms.uDeltaMouse.worth = present
    this.variable.materials.uniforms.uMouse.worth = uv
  }
Now, within the GPGPU fragment shader, we’ll retrieve the mouse coordinates to calculate the space between every pixel of the feel and the mouse. We are going to then apply the mouse delta to the feel primarily based on this distance.
uniform vec2 uMouse;
uniform vec2 uDeltaMouse;


void important()
{
    vec2 uv = gl_FragCoord.xy/decision.xy;

    vec4 coloration = texture(uGrid,uv);

    float dist = distance(uv,uMouse);
    dist = 1.-(smoothstep(0.,0.22,dist));


    coloration.rg+=uDeltaMouse*dist;

    gl_FragColor = coloration;
}
It’s best to get one thing like this:
Discover that if you transfer your cursor from left to proper, it’s coloring, and if you transfer it from proper to left, you might be erasing. It’s because the delta of the UVs is detrimental if you go from proper to left and constructive the opposite means round.
You’ll be able to sort of see the place that is going. Clearly, we’re not going to show our displacement texture; we wish to apply it to our preliminary picture. The present texture now we have is way from good, so we received’t use it but, however you possibly can already take a look at it on our picture in order for you!
Do this within the fragment shader of your aircraft:
void important()
{
    vec2 newUvs = coverUvs(uImageResolution,uContainerResolution);

    vec4 picture = texture2D(uTexture,newUvs);
    vec4 displacement = texture2D(uGrid,newUvs);

    vec2 finalUvs = newUvs - displacement.rg*0.01;

    vec4 finalImage = texture2D(uTexture,finalUvs);

    gl_FragColor = finalImage;
}
Right here’s what you must get:
The primary downside is that the form of the displacement shouldn’t be a sq.. It’s because we’re utilizing the identical UVs for our displacement as for the picture. To repair this, we’re going to give our displacement its personal UVs utilizing our coverUvs operate.
void important()
{
    vec2 newUvs = coverUvs(uImageResolution,uContainerResolution);
    vec2 squareUvs = coverUvs(vec2(1.),uContainerResolution);

    vec4 picture = texture2D(uTexture,newUvs);
    vec4 displacement = texture2D(uGrid,squareUvs);

    vec2 finalUvs = newUvs - displacement.rg*0.01;

    vec4 finalImage = texture2D(uTexture,finalUvs);

    gl_FragColor = finalImage;
}
Now you must have a square-shaped displacement. You’ll be able to show our texture once more since we nonetheless have to work on it. Within the gl_FragColor of the aircraft shader, set the worth again to displacement.
The most important situation you possibly can clearly see with our present texture is that it’s not fading out. To repair that, we’re going to multiply the colour by a price smaller than 1, which can trigger it to progressively are inclined to 0.
//... gpgpu shader
coloration.rg+=uDeltaMouse*dist;

float uRelaxation =  0.965;
coloration.rg*=uRelaxation;

gl_FragColor = coloration;
Now it’s a bit bit higher, however nonetheless not good. The pixels which are nearer to the cursor take much more time to fade out. It’s because they’ve collected far more coloration, so that they take longer to succeed in 0. To repair this, we’re going to add a brand new float uniform.
Add this on the backside of the createVariable methodology of the GPGPU:
this.variable.materials.uniforms.uMouseMove = new THREE.Uniform(0)Then add this on the prime of updateMouse:
updateMouse(uv: THREE.Vector2) {
  this.variable.materials.uniforms.uMouseMove.worth = 1
// ... gpgpu.updateMouse
Then, add this to the render methodology of the GPGPU:
render() {
    this.variable.materials.uniforms.uMouseMove.worth *= 0.95
    this.variable.materials.uniforms.uDeltaMouse.worth.multiplyScalar(0.965)

    this.gpgpuRenderer.compute()
  }
Now you may discover that the colours are very weak. It’s because the worth of uDeltaMouse is fading out too rapidly. We have to enhance it within the updateMouse methodology:
updateMouse(uv: THREE.Vector2) {
    this.variable.materials.uniforms.uMouseMove.worth = 1

    const present = this.variable.materials.uniforms.uMouse.worth as THREE.Vector2

    present.subVectors(uv, present)
    present.multiplyScalar(80)

    this.variable.materials.uniforms.uDeltaMouse.worth = present
    this.variable.materials.uniforms.uMouse.worth = uv
  }
Now now we have our desired displacement impact:
Creating the RGB Shift Impact
All that’s left to do is the RGB shift impact. Understanding this impact is fairly easy. You most likely know {that a} coloration in GLSL is a vec3 containing the pink, inexperienced, and blue elements of a fraction. What we’re going to do is apply the displacement to every particular person coloration of our picture, however with totally different intensities. This fashion, we’ll discover a shift between the colours.
Within the fragment shader of the aircraft, add this code proper earlier than the gl_FragColor = finalImage;
/*
* rgb shift
*/

//separate set of UVs for every coloration
vec2 redUvs = finalUvs;
vec2 blueUvs = finalUvs;
vec2 greenUvs = finalUvs;

//The shift will observe the displacement course however with a lowered depth,
//we want the impact to be delicate
vec2 shift = displacement.rg*0.001;

//The shift power will rely upon the velocity of the mouse transfer,
//for the reason that depth depend on deltaMouse we simply have to make use of the size of the (pink,inexperienced) vector
float displacementStrength=size(displacement.rg);
displacementStrength = clamp(displacementStrength,0.,2.);

//We apply totally different strengths to every coloration

float redStrength = 1.+displacementStrength*0.25;
redUvs += shift*redStrength;

float blueStrength = 1.+displacementStrength*1.5;
blueUvs += shift*blueStrength;

float greenStrength = 1.+displacementStrength*2.;
greenUvs += shift*greenStrength;


float pink = texture2D(uTexture,redUvs).r;
float blue = texture2D(uTexture,blueUvs).b;
float inexperienced = texture2D(uTexture,greenUvs).g;

//we apply the shift impact to our picture
finalImage.r =pink;
finalImage.g =inexperienced;
finalImage.b =blue;


gl_FragColor = finalImage;
And now now we have our impact!
Thanks for studying!